step by step superhero drawing
How to draw a superhero: drawing step by step
Learn how to draw a superhero with a strong body from simple triangle shapes and detailed hero costume. Easy step by step instructions.

Our superhero follows the stereotypes: A strong man with big wide shoulders and a narrow waistline, a square head with a sharp square chin. He also wears the usual tight suit with long gloves and high boots, and sports a flowing golden cape.
pencil
,
eraser
,
colour pencils
drawing paper
or
sketch book
Love drawing? Never miss a tutorial!
How to draw a superhero: base sketch step by step
Step 1 : Sketch the head
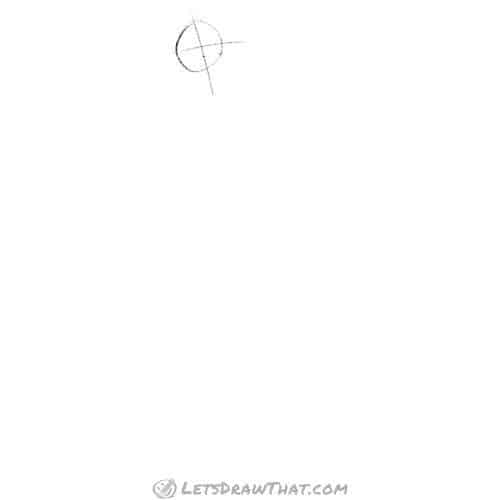
Our superhero drawing starts very simply. Draw a small circle for the head. Then add a little face cross, which divides the circle into four parts.
Step 2 : Sketch the chin
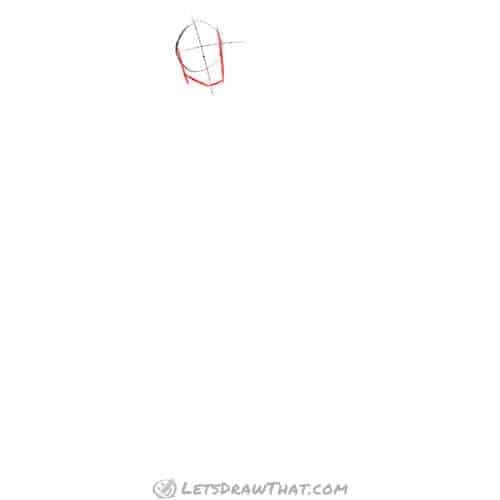
Keep drawing the head. Add two straight lines just touching the sides of the head circle for the sides of our face.
Then add a chin – kind of a rectangle with a cut off corner: One short straight line at a right angle to the centre line. Slightly up from there to the left side.
Step 3 : Draw the face
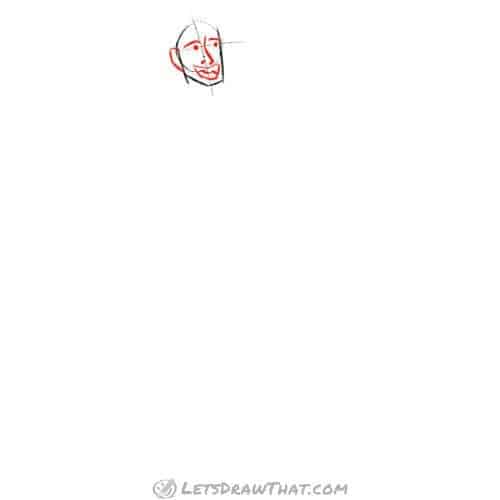
Now it is time to give our superhero a friendly face.
Start with just two simple dots for the eyes – those go onto the vertical face line. Then draw an angled line for a nose, with two dots for nostrils. Add open smiling mouth – a flat-lying "D" shape with a small squiggle for the tongue.
Next draw two straight lines for eyebrows, just above the eyes. And finally, add a "C" shape for an ear, starting at the left middle cross line.
Step 4 : Sketch the base body shapes

Here comes the fun part – our superhero needs a super body! A strong superhero body starts with really wide shoulders and tapers down to a narrow waist. So the top half of the body is kind of a rectangle cut off at the waist. That shape is called a "trapezoid" or "trapezium".
The smaller lower part is a narrow rectangle with bottom corners cut off.
Our body and head are connected by two straight lines, about the width of the head. This is our neck.
Step 5 : Add arms and legs
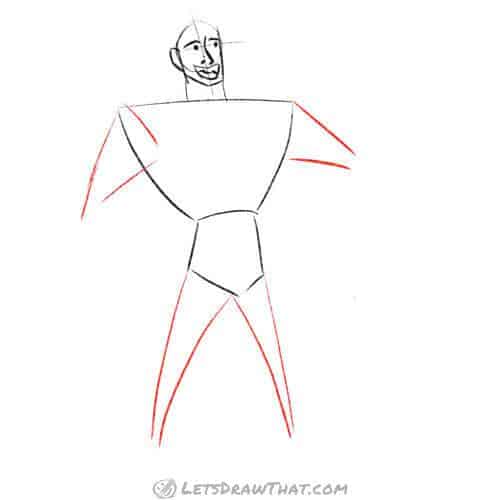
Keep building your superhero's body by adding some really simple arms and legs. We will draw them as two wider triangles for the upper arms, and two long and narrow triangles for the legs.
Step 6 : Sketch forearms and feet
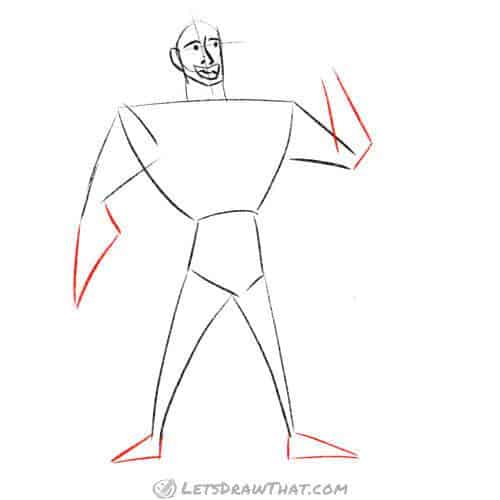
Finish off the legs by adding some feet – again made from simple triangles.
Then add forearms to the body – those are triangular shapes, to keep with the overall theme, that connect to the upper arms.
Step 7 : Finish the sketch with hands and hair
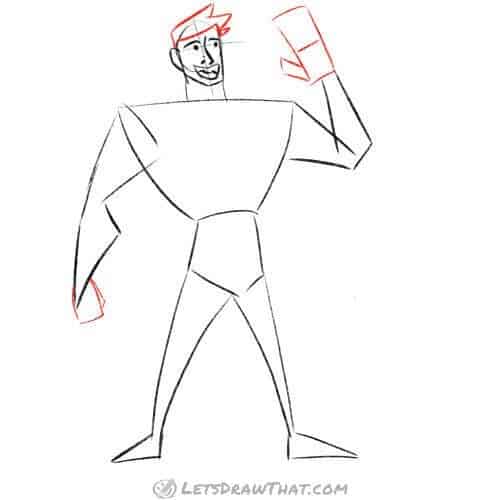
Our superhero drawing is almost done – he just needs a pair of hands and some hair.
The waving hand we draw from a simple rectangle, which we will split in half – the upper part will be the fingers, the lower part the palm of the hand. Add a small rectangle to the side for the thumb. The lower hand is closed into a fist – drawn as a rectangle again, with a small thin rectangle on the side for a thumb.
Then give your hero some hair – we liked the spiky swoosh hair here.
Step 8 : Final details

While our base figure is done, we can always improve it with a few more details. Here we sketched in the individual fingers on the waving hand.
Then we improve our superhero's uniform with an emblem and a big "H" for "hero" on the chest and give him a nice belt.
And finally – every superhero needs to have a cape – so let's draw a nice flying-in-the-wind cape and attach it at the shoulders with a pair of epaulettes.
How to draw a superhero: outline the drawing step by step
Step 1: Outline the head

That is our superhero completely sketched. Let's start outlining him now. Draw out the head first.
Step 2: Outline the upper body

Keep drawing out the upper body.
Notice we have drawn out the chest emblem and the letter "H" properly. Also, we have added some extra lines on the forearms – these will mark out the gloves our hero is wearing.
Step 3: Draw the legs and lower body

In this step, we add a round buckle to the belt, and two similar arced lines on the legs to mark out the superhero's high shoes. Then outline the cape and you have drawn a superhero.
How to draw a superhero: finished drawing
How to draw a superhero: finished outline drawing

Our usual final step is to clean up the sketch lines with an eraser to show our complete superhero drawing.
How to draw a superhero: finished drawing coloured-in
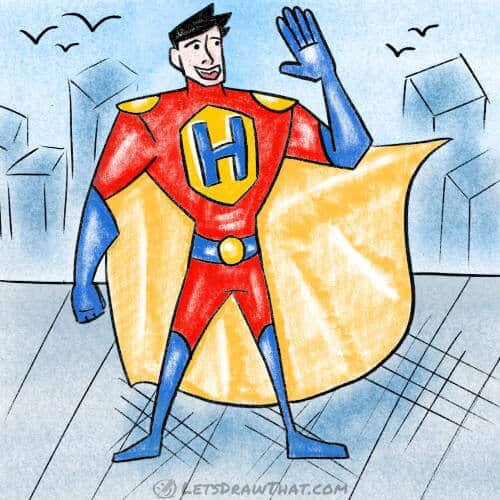
And since every drawing looks better in colour, here is our hero coloured in. We have chosen bold colours for a bold man – a bright red suit, with contrasting blue shoes and gloves. And nothing less but gold (well, dark yellow) for the cape, chest badge, and epaulettes.
And since superheroes usually operate in big cities, you can draw some simple city skylines for the background. Remember how to draw cubes?
Like this tutorial? Share it with others:
Love drawing? Never miss a tutorial!
Get notified when there is a new tutorial published on Let's Draw That! (2-4 times a month)
Check out the latest tutorials:
Like this? Share the fun with others:

step by step superhero drawing
Source: https://letsdrawthat.com/how-to-draw-a-superhero/
Posted by: millercrummon.blogspot.com


0 Response to "step by step superhero drawing"
Post a Comment