

How To Create Private Nameservers
In order to access website which is hosted on your VPS via your domain, you need to point this domain to nameservers, create a DNS zone on them and specify the IP address of your VPS in this DNS zone.
First of all, you need to decide what kind of nameservers you are going to use. There are three options. The first option is to use our public nameservers. You can find more information about this option here.
The second option is to use third party public nameservers. There are plenty of them in the Web, so you can find them via Google or other search engines. Sometimes domain registrars provide their customers with their own public nameservers, so you can contact your domain registrar and make inquiries.
The third option is to create private nameservers on your VPS/dedicated server. This option may be useful for web hosting resellers or for those who want to involve their nameservers in brand promotion of their company.
So, in order to create private nameservers, you need to take 3 following steps:
1.Step #1. Register the nameservers.
Note: If your domain has been registered elsewhere - please contact your domain registrar for more information (usually private nameservers can be added in Client Area of domain registrar however there might be exceptions).
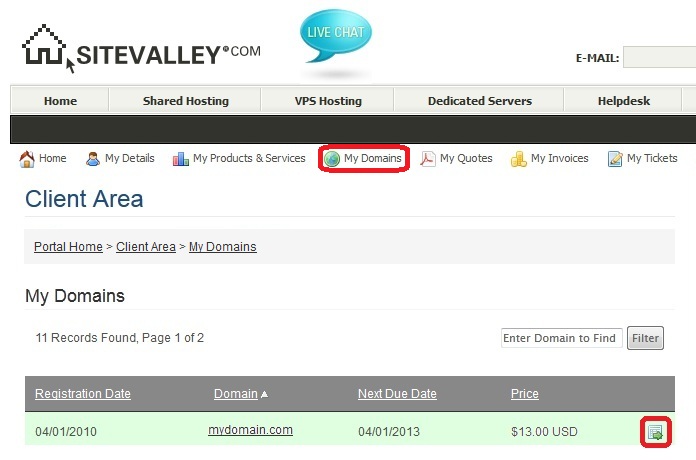
1.1 If your domain is registered with SiteValley.com, go to Client Area > My Domains.
1.2. Click on the green arrow next to your domain.

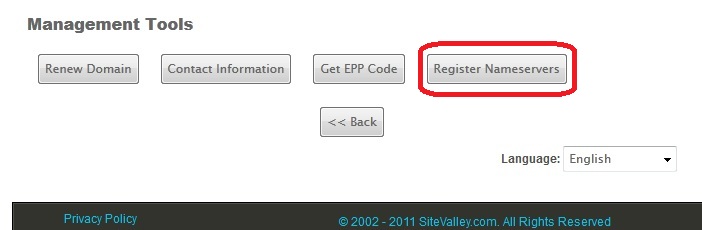
1.3. Scroll down and click the button "Register Nameservers"
1.4. Type in the name of the nameserver (e.g. ns1) and IP address of the VPS, which you decided running the nameserver software on and save the changes. If you have several VPSs, we recommend you to register nameservers on the VPS that have Control Panel installed on it.
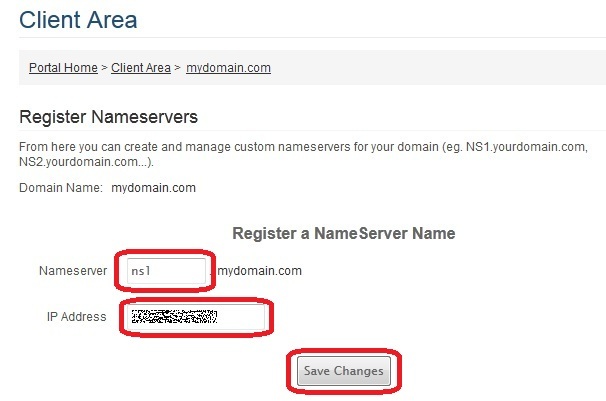
If everything is OK you will receive the following message:

1.5. Repeat step 1.4. to add the second nameserver (e.g. ns2).
2. Step #2. Add a DNS zone to your DNS server. It can be done in web hosting control panels e.g. WHM/cPanel, DirectAdmin etc., which, among other services, already include DNS server. If you don't have those control panels, you can install DNS server software on your VPS (e.g. BIND or PowerDNS) and add DNS zone using this software.
2.1. If you use DirectAdmin CP:
2.1.1. Go to Admin Level >> Admin Tools >> DNS Administration. Add your domain name, IP address of the VPS you have previously registered nameservers for and names of nameservers. Click "Add".

2.1.2. Edit the records the way it's shown on the image below. Some of the values will be specified automatically. Check that your domain, IP address, nameservers are specified correctly and edit them if needed.

2.2. If you use cPanel/WHM CP:
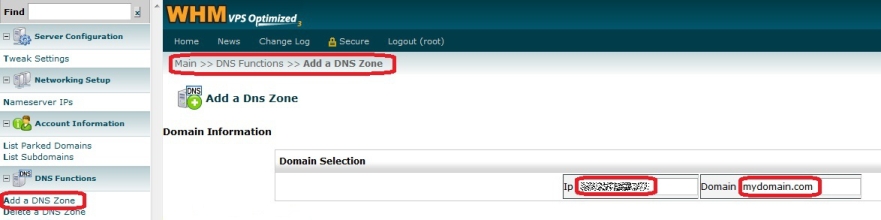
2.2.1. Login to WHM >> DNS Functions >> Add a DNS Zone. Type in the IP address of the VPS you have previously registered nameservers for and the domain itself. Click "Add Zone".
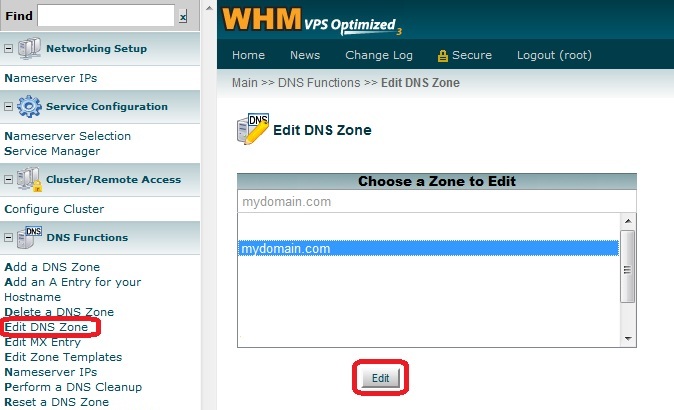
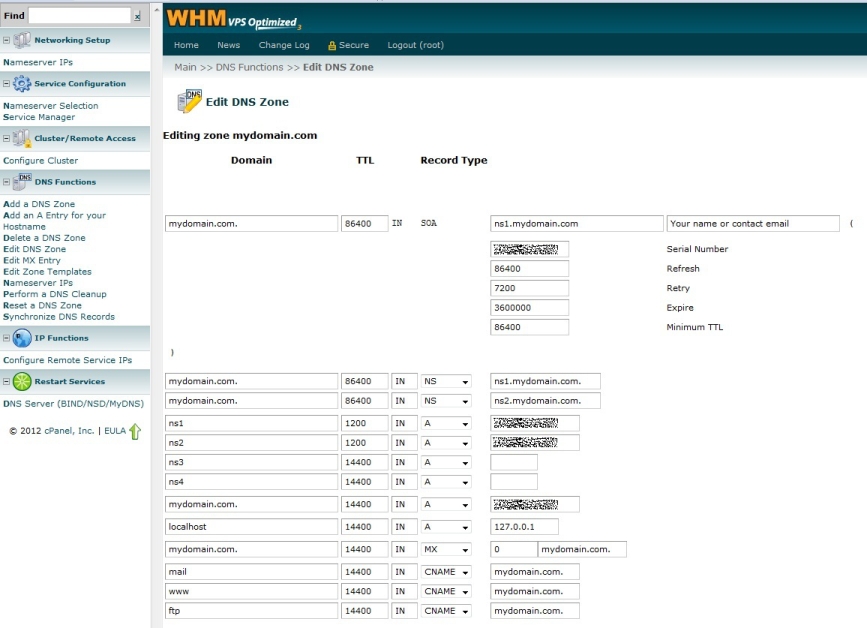
2.2.2. Go to DNS Functions >> Edit DNS Zone, choose DNS zone you've just created and click "Edit".
2.2.3. Edit the records the way it's shown on the image below. Some of the values will be filled in the text boxes automatically. Check that your domain, IP address, nameservers are specified correctly and edit them if needed. Save the changes.
3. Step #3. Point your domain to your private nameservers.
Note: If your domain has been registered elsewhere - please contact your domain registrar for more information (usually nameservers can be specified in Client Area of domain registrar however there might be exceptions).
3.1 If your domain has been registered at SiteValley.com, go to Client Area > My Domains.
3.2. Click on the green arrow next to your domain.
3.3 Type in the names of your private nameservers and save the changes.
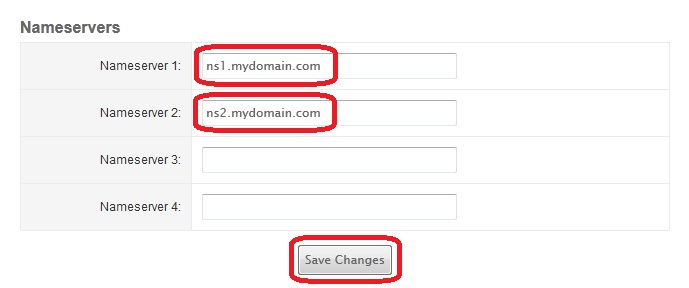
Congratulations! Your domain has been pointed to your private nameservers. Now you need to allow up to 72 hours before the changes have propagated all over the Internet.
Please, note that DNS records can be changed when necessary in WHM or DirectAdmin the way it is shown above.
Note: The same steps for setting up private nameservers are applicable in case you have ordered one of our cheap dedicated hosting servers.
How To Create Private Nameservers
Source: https://sitevalley.com/faq/private-name-servers.html
Posted by: millercrummon.blogspot.com
0 Response to "How To Create Private Nameservers"
Post a Comment