

How To Make Drawer Fronts
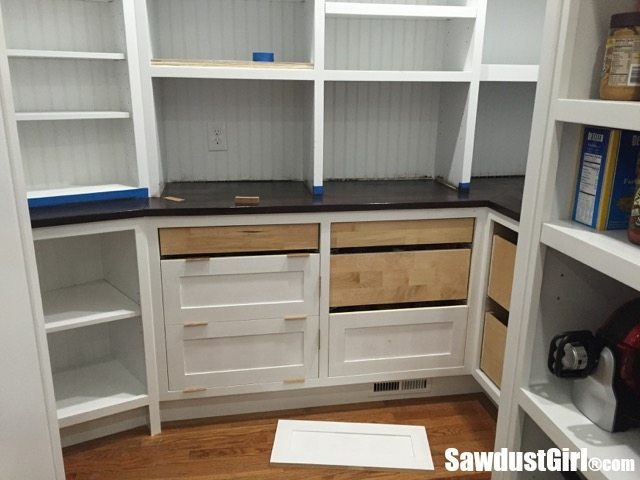
Building drawer fronts for the pantry was a big achievement. After finally getting the drawers all built and installed with no more broken drawer glides (knock on wood) I was finally able to move forward on building drawer fronts. Inset drawers are so much more work than overlay because you have to size your drawer fronts perfectly and then there is tons of fiddle factor involved with the installation because you have to center the drawer front so there is exactly the same amount of space on all sides. This point in the project, when I'm pretty tired of it all and just want to be done, is about the time I ask myself, "WHY did you HAVE to do inset? WHY"?
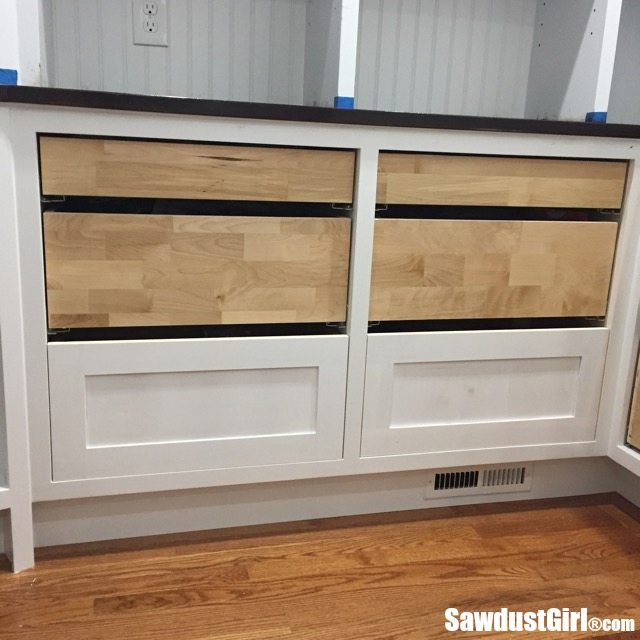
The simple answer is that I like the look and that is what I chose to do about 50 years ago when I started this kitchen remodel. So I'm going to push through and trudge forward. Besides, I'd have to reinstall all my drawers if I changed my mind because I installed all 30+ drawers in the kitchen and pantry with the appropriate setback for inset drawers and that sounds like too much stinking work so, onward and upward!
Building Drawer Fronts
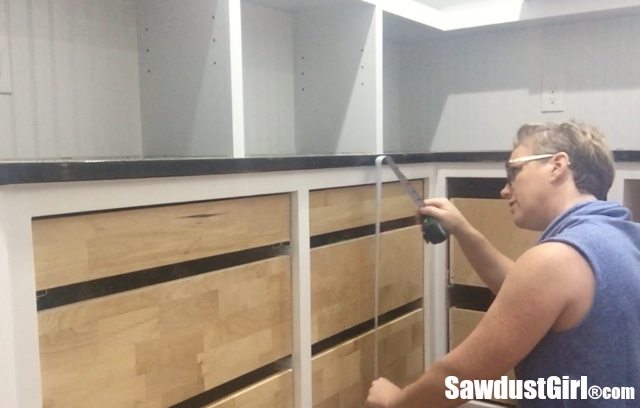
Measuring the cabinet opening.
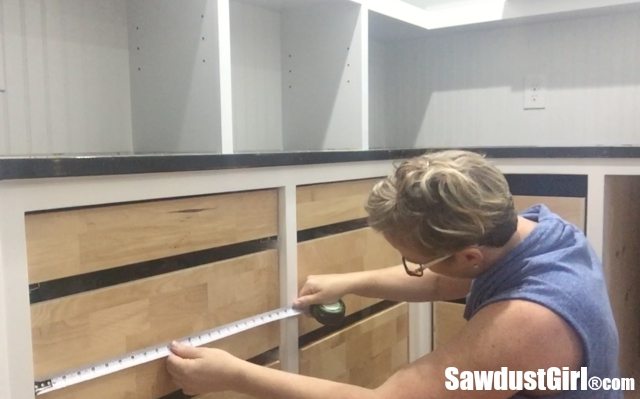
I generally create a drawing of the cabinet opening with the drawers in it with their exact size, location and the spaces in between them. I measure the width starting at the top, then I slowly slide my tape measure down to the bottom of the opening making sure it is the same all the way down.
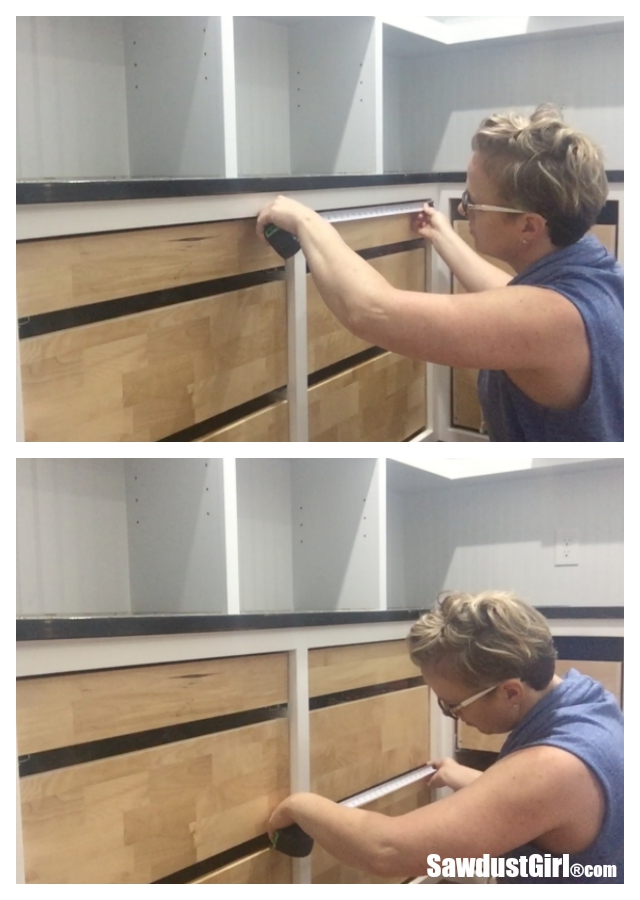
Then I do the same thing for the height, sliding the tape measure from one side to the other, verifying that I built a cabinet with a uniform opening — or noting any discrepancies. It happens.
The last thing I add to my drawing is the placement of the drawers and drawer runners if they are undermount like mine are. I want the drawer front for each drawer to cover the drawer and the hardware.
Turning those measurements into drawer fronts
I'm going for 1/16″ gap on all sides of each drawer front. I'm building drawer fronts and doors with flat panels and square edges.You can go about this many different ways. This is how I did it.
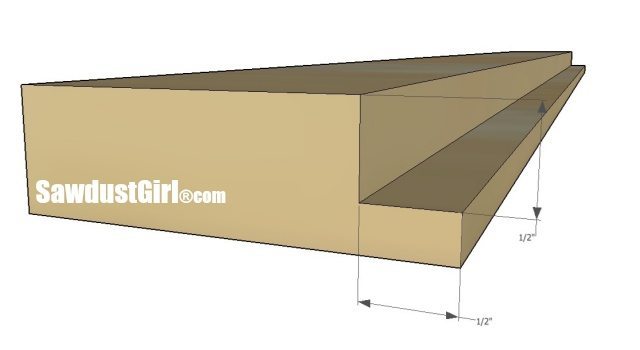
I use 1/4″ panel on doors with a 1/4″ reveal and I want the reveal to be the same on my drawer fronts. So I'm using 1/2″ panel material on the drawer fronts because I don't want space behind the panel. Space behind the panel would allow the panel to bow in when the drawer pull is installed and I don't want that. I want the rails and stiles and panel to all be flush on the backside.
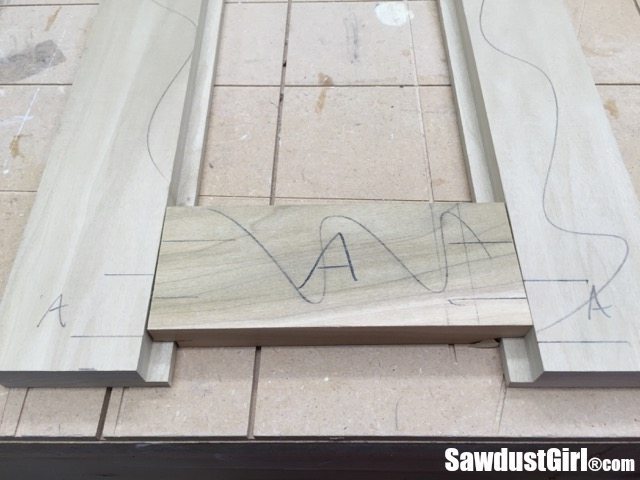
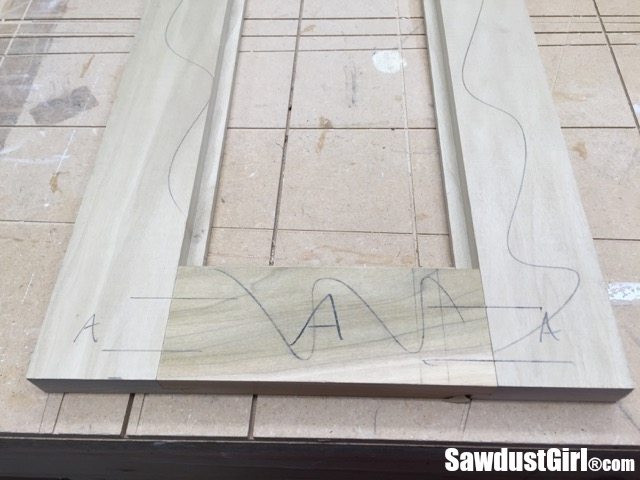
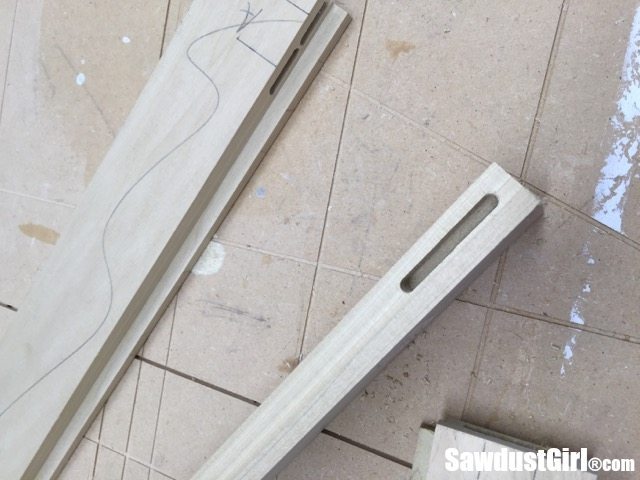
I'm cutting 1/2″ x 1/2″ rabbets on my rails and stiles to house my panel. The ends of the stiles will be cut to sit on top of the rabbet and reinforced with loose tenons. You could use biscuits or pocket holes since you won't see the back of the drawer fronts.
Cutting the components to length
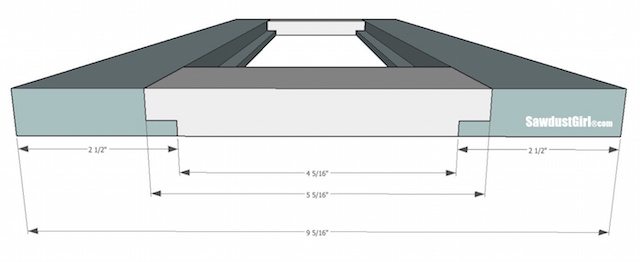
I size therails (horizontal pieces) to span the full width of the opening to allow me to trim some off to clean up my joints because they don't always end up perfectly flush. Once the front is built, I trim 1/16″ off each side.
The total drawer height minus 4″ is the length to cut the stile. That comes from:
- 2 1/2″ wide stock times two is 5″.
- 1/2″ rabbet on both ends is 1″
- 5″ – 1″ = 4″
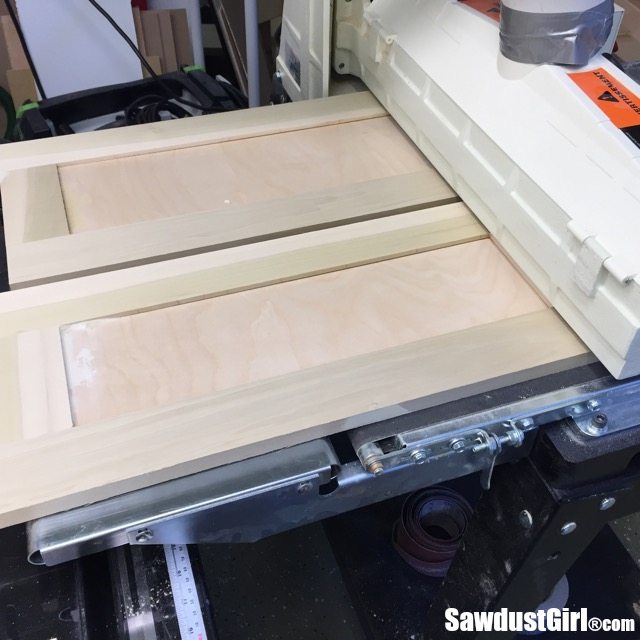
Cut the Rabbets
Cutting grooves, dados and rabbets is best done on a router table or a table saw. Cutting on a router table is generally not as scary because the cutting part is so much smaller than a 10″ table saw blade. But you generally need to make several passes with a router to make deep cuts so it takes longer.
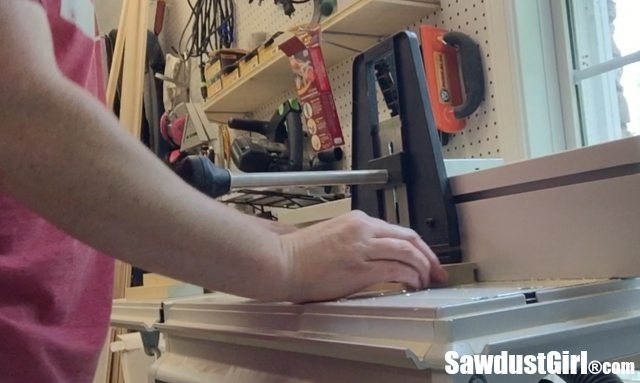
I used my router for a few and then switched to my table saw with a dado set.
Once all the main rabbets were cut I flipped my stiles over, lowered the blade to 1/4″ and cut a flap to sit on top of the rail.This would be so much safer with a sled but I'm holding it securely to my miter gauge.
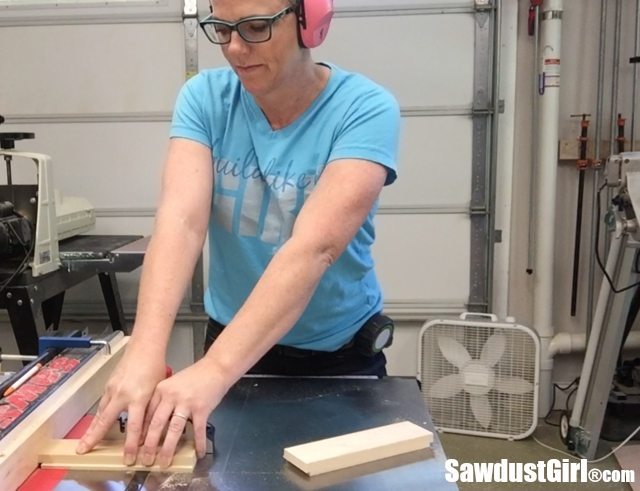
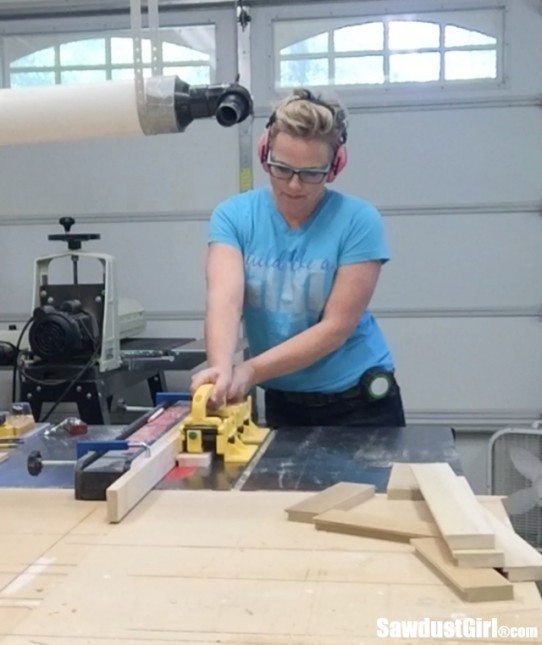
I cut short, tested, raised the blade and recut several times before I got a perfect fit.
I'm reinforcing my "lap joints" with loose tenons. You could also use biscuits if your cutter is long enough. Or, pocket screws would be ok in this application because you won't see the back of the drawer front once it's installed.
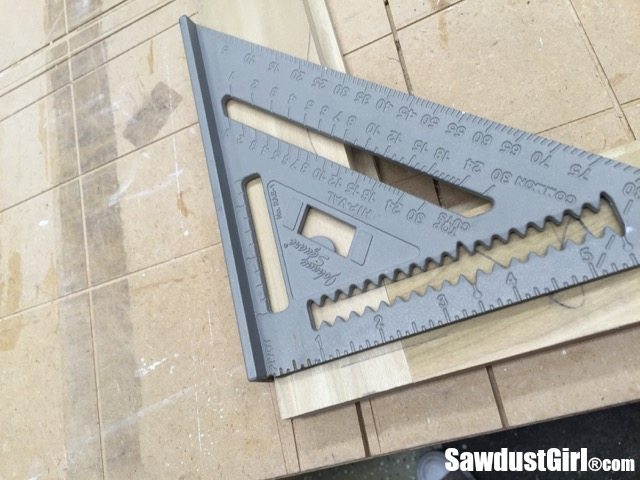
I used a speed square to mark the location for my mortises and then mark the matching sides so I put them together correctly after I cut all my mortises.
I'm using my Festool Domino for the loose tenons.
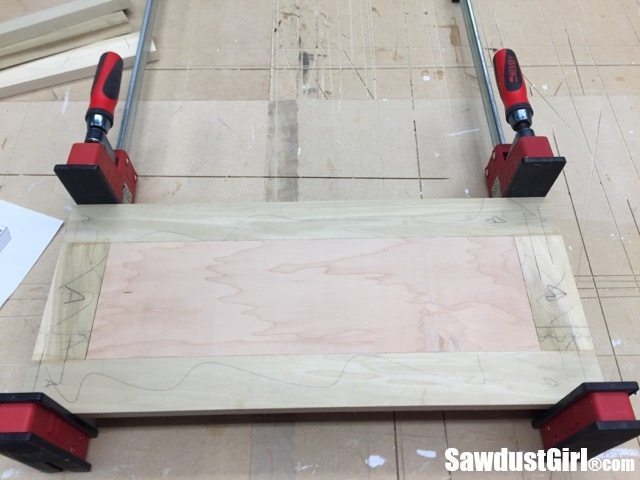
I glue the stiles onto one rail first so I can get the tenons into the other side and insert the other rail.

Clamp that together gently. I just want to close the gaps and make sure the wood is in contact with the joining piece while keeping all the parts flat.

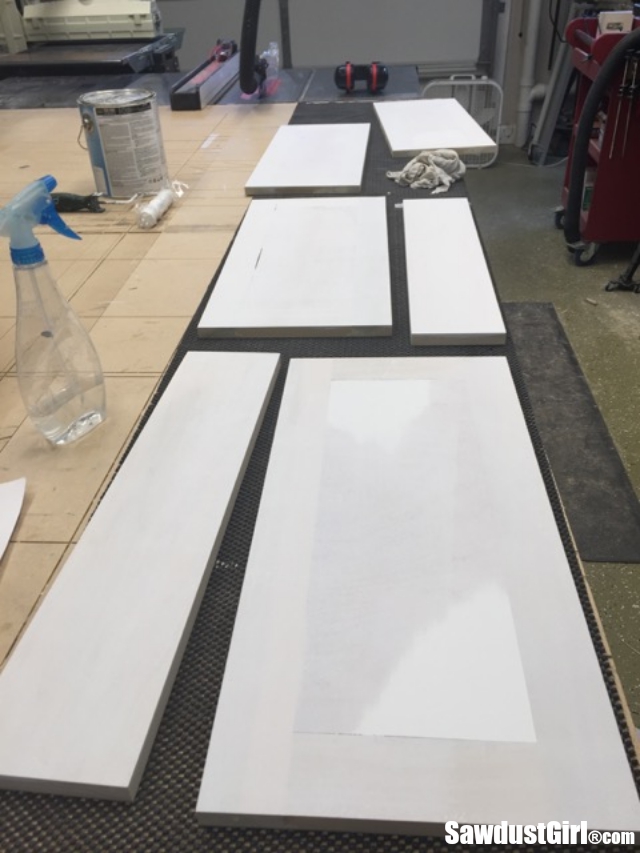
At this point I measure and cut the panel. I used 1/2″ cabinet grade plywood because I had a bunch of scraps but I'll use 1/2″ MDF in the kitchen because I think it will paint better.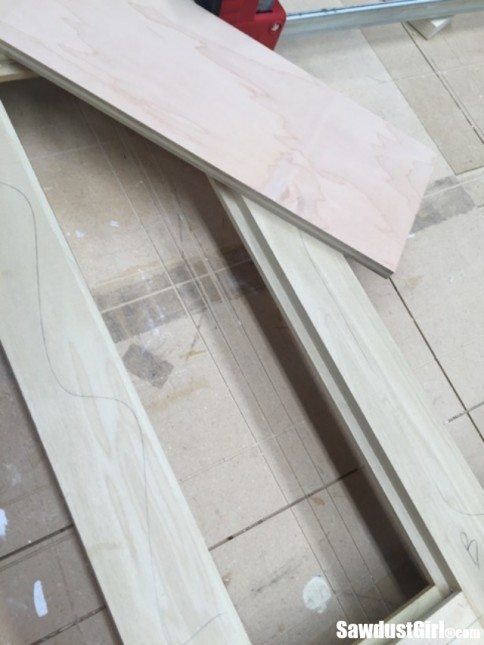
Because the panels are dimensionally stable plywood, I didn't need to worry about expansion and I simply glued them in place. I would have also shot in some small, short nails if I'd had my air compressor but it was upstairs and I didn't want to lug it down.
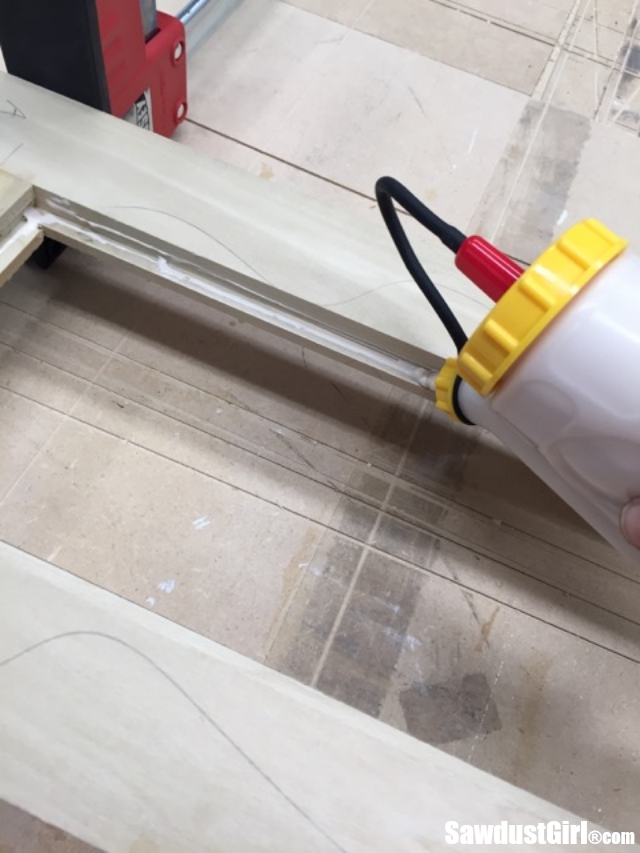
I didn't even want to go up to get my battery powered nail gun so I used what I could grab from right there in the shop. I only needed something heavy to weight it down.
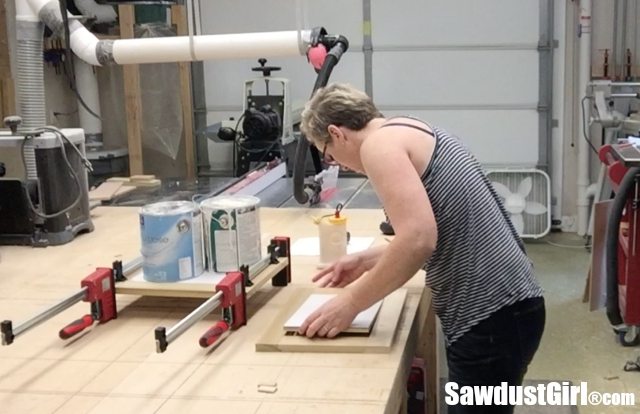
Once I removed the clamps, it was time to clean them up and make them pretty.

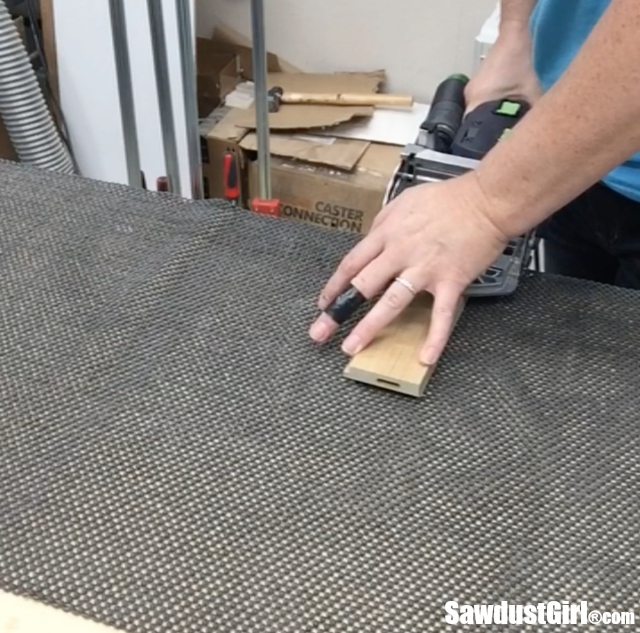
I bought this big drum sander earlier this year because I knew I would be building a TON of doors and drawer fronts and it has paid off. It makes quick work of leveling out uneven surfaces. I started out with 80 grit to level out. Then I moved up to 120 to remove the scratches the course 80 grit made.
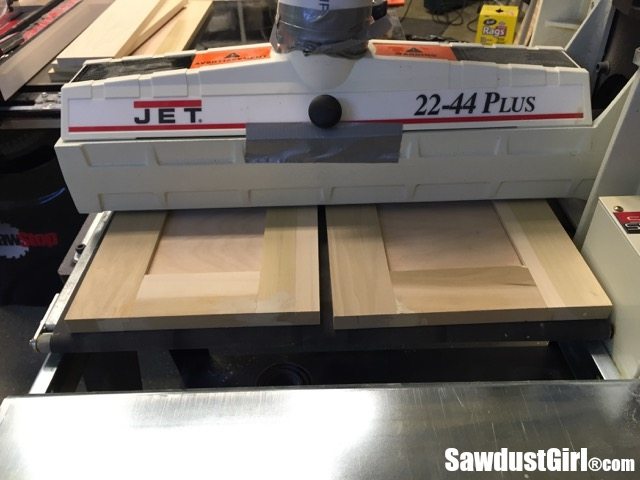
Now if you don't have a big drum sander (like I haven't for the last 12 years) you can do this all by hand with an orbital sander. It just takes longer and you have to make sure to go over the whole surface and not just focus on the joints or you can easily end up with "dents" at the joints –created by you — with your sander. I know because I've done it. Many times.
Which is why I decided that I'd invest some of the money I'm saving by building drawer fronts and doors myself into tools that would get professional results — more easily. :=)

I am painting with a water borne paint so before my final sanding, I spray the surfaces with some water to raise the grain. After that dries, I do a final sanding with 220 grit sandpaper. That cuts off the hairy fibers. Then when I prime, they won't raise again.
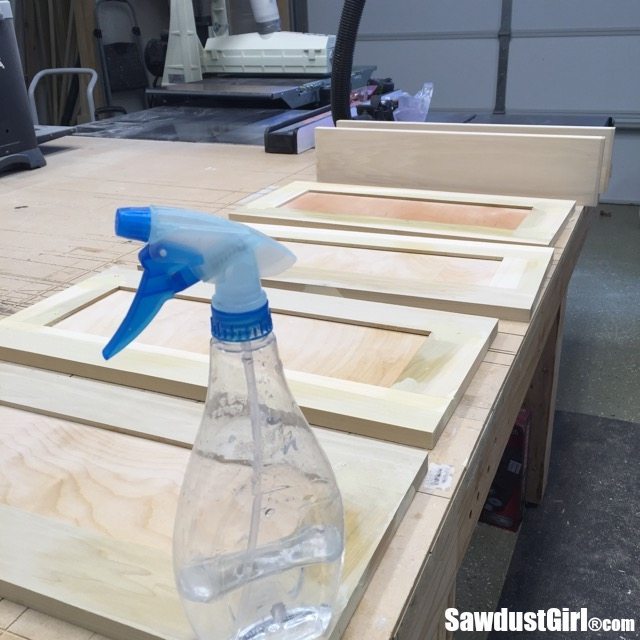
The front panels and edges of the reveal have to be sanded by hand. I wrap some flexible sandpaper on a block of wood for this.
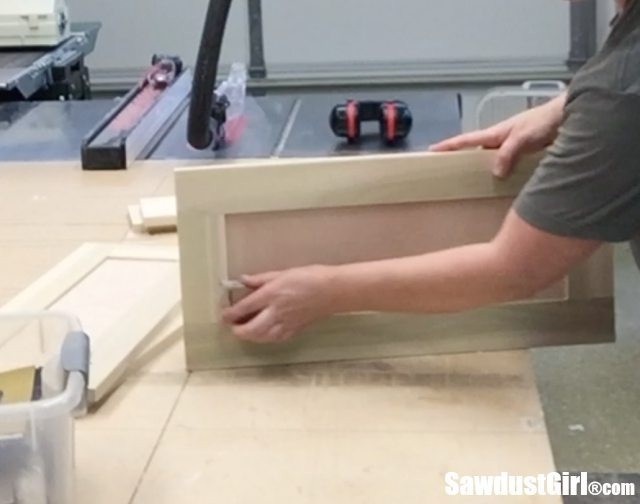
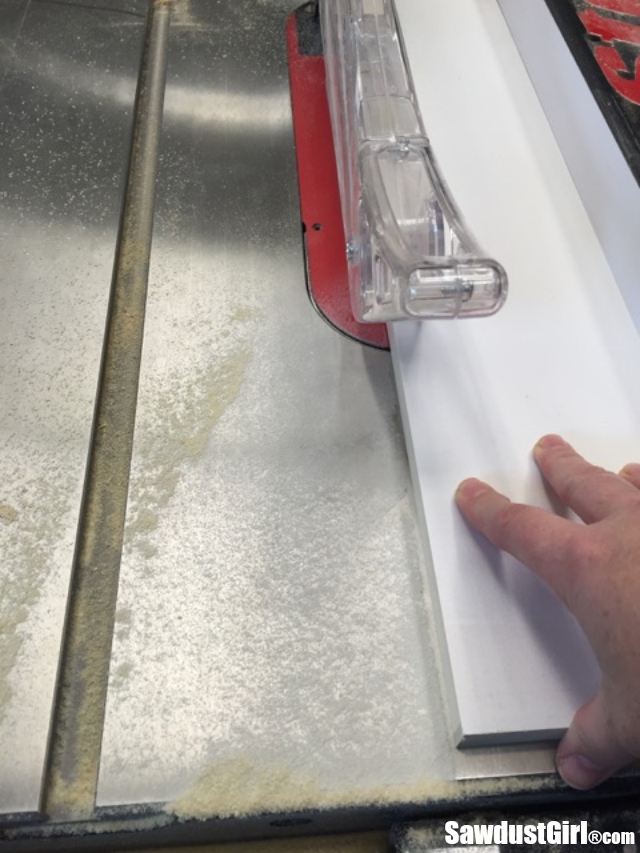
This is the stage where I measure my finished drawer fonts and check those against my little drawing and trim up the edges. Remember I left an intentional 1/16″ on each edge. My finished piece need exactly that — or something slightly different. It's difficult to have them come out exactly how you want them. That is why I always shoot for slightly larger than I need. 'Cause it's easy to trim shorter but you kinda' have to start over if you make them too small!
I need to test fit everything before I go ahead and paint but I go ahead and prime now. The cabinets are already painted white and the variation in coloring within the wood easily trick my eyes into thinking things are "off" when they really aren't. Priming takes away all those optical illusions and primer is easy to work with so I don't mind re-priming if I need to trim off here and there.
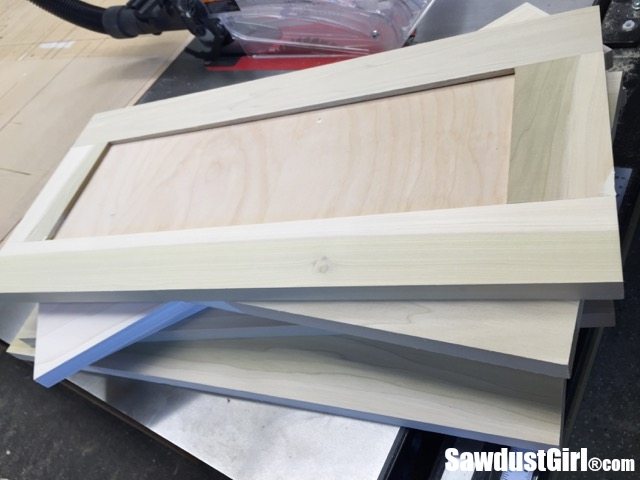
Once dry, it's time to test fit.
I use spacers (Speedshims are very handy) to ensure that I have the right spacing.
And trim off a little where I need to. The top panel is only 4+" wide which is too small for a panel so it's simply a flat piece of poplar. Easy to trim down without messing up the proportions of the rails.
*If I have to trim off any or my rail or stile, I cut equal parts off each so the panel remains centered.
Once properly fitted, as I remove the drawer fronts, I number them so I put them back in place properly.

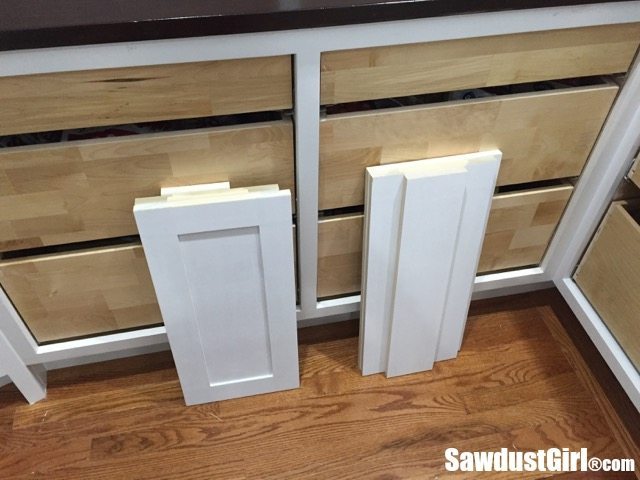
Building the drawer fronts and fitting them is definitely the most time consuming part. Now I can paint and install!
Get all my cabinet building tips in one place in myCabinet Building 101 eBook.You can download it and keep it on hand!
$9.99 Add to cart
How To Make Drawer Fronts
Source: https://sawdustgirl.com/building-drawer-fronts/
Posted by: millercrummon.blogspot.com
0 Response to "How To Make Drawer Fronts"
Post a Comment